Table of Contents >> Show >> Hide
- Why a Cute Garden Shed Is Actually a Smart Idea
- Start With the Unsexy Stuff So the Cute Stuff Lasts
- The Design Ingredients That Make a Shed Extra Cute
- How to Make It Functional Inside
- Don’t Forget the Outside Styling
- Mistakes That Can Ruin the Look
- What the Experience of Building One Is Really Like
- Final Thoughts
If a garden shed has ever struck you as “basically a tiny house for rakes,” you are not wrong. But you are also not dreaming big enough. The cutest DIY garden shed ever is not just a place to stash a shovel and a bag of potting soil. It is part storage zone, part backyard personality, part practical workspace, and part visual charm bomb. In other words, it earns its square footage.
The best garden sheds do two jobs at once: they work hard and look adorable while doing it. They keep tools dry, organize the chaos of gloves, twine, seed packets, and flowerpots, and add a cottage-style focal point to the yard. A great shed can become a potting station, a mini greenhouse-adjacent retreat, a flower-cutting corner, or simply the prettiest place on your property that also contains a hose nozzle.
And that is exactly what makes this project so fun. You are not just building a box. You are creating a tiny, functional destination.
Why a Cute Garden Shed Is Actually a Smart Idea
Let’s defend the “cute” part for a second, because cute sometimes gets unfairly treated like fluff. In backyard design, charm has a job to do. A well-designed shed can tie together your landscaping, echo your home’s style, and make a work zone feel intentional instead of random. It can also encourage you to use the space more often, which is surprisingly important. People maintain spaces they enjoy. They ignore spaces that look like a punishment.
That means the cutest DIY garden shed ever should not be cute instead of practical. It should be cute because it is thoughtfully planned. The windows bring in light. The door is wide enough for a wheelbarrow. The shelving keeps tools off the floor. The foundation protects against moisture. The pretty paint color? That is just the victory lap.
Start With the Unsexy Stuff So the Cute Stuff Lasts
Before you start fantasizing about flower boxes, vintage hooks, and the exact shade of sage green that says “I read seed catalogs for fun,” start with the basics that keep a shed standing straight and staying dry.
Choose the Right Spot
Your shed should sit on level ground with decent drainage. This is not the glamorous part of the project, but it is the part that prevents future misery. A low, soggy location may look convenient until the first heavy rain turns the area into a swampy little cautionary tale. Pick a spot that stays relatively dry, is easy to access from the garden, and has enough clearance for doors, maintenance, and airflow.
Also think about sunlight. If the shed will double as a potting area or plant-prep station, natural light matters. If it will mostly store tools, too much direct heat may not be ideal. Bonus points if the shed can visually anchor a garden bed, edge a path, or sit where it feels tucked in rather than dropped in.
Check Local Permit and Setback Rules
This part is about as thrilling as reading warranty paperwork, but it matters. Some small sheds may be exempt from full building permits depending on where you live, but zoning setbacks, easements, height limits, and utility restrictions can still apply. Translation: do not build your dream shed three feet into a rule you did not know existed.
The cutest shed in the county gets dramatically less cute if you have to move it later.
Build a Foundation That Won’t Betray You
A strong base is the difference between “storybook garden shed” and “crooked outdoor drawer.” Your foundation choice depends on shed size, soil conditions, and budget, but the goal is always the same: keep the structure level and reduce moisture problems.
For a small DIY shed, common options include a compacted gravel base, concrete blocks, skids, or a full slab for larger or more permanent builds. Gravel is popular for good reason. It helps drainage, supports leveling, and does not act like a sponge. Whatever you choose, the shed floor should be lifted and protected from direct ground moisture. Wood and soggy soil are not best friends. They are barely polite acquaintances.
The Design Ingredients That Make a Shed Extra Cute
Now we get to the dessert course. Once the placement and structure are handled, you can make your shed look like the tiny backyard celebrity it was born to be.
Pick a Shape With Personality
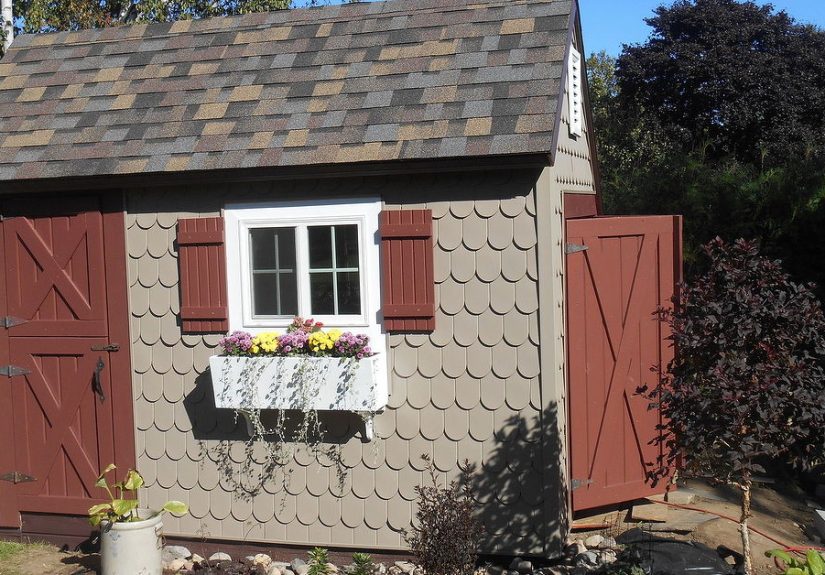
Simple rectangular sheds are easy to build and easy to style. A gable roof gives you that classic cottage look. A saltbox roof can feel storybook and slightly more custom. A lean-to works beautifully in tight yards and can still look charming with the right trim and paint. The magic is not in choosing the fanciest roofline. It is in choosing one that suits your yard and repeating the style details thoughtfully.
If your house has traditional shutters, white trim, black hardware, cedar accents, or a farmhouse vibe, echo those same cues in the shed. Matching without fully cloning is the sweet spot.
Use Windows Like Jewelry
Few things make a shed look friendlier faster than windows. They brighten the inside, soften the exterior, and give the structure a finished, lived-in quality. Even one small window on the door can change the whole mood from “yard storage unit” to “tiny gardening cottage.”
Want the full adorable effect? Add window boxes. They are almost unfairly effective. Fill them with trailing flowers, herbs, or seasonal color, and suddenly the shed looks like it has excellent taste and a social calendar.
Choose Paint That Feels Intentional
The cutest DIY garden shed ever usually does not happen by accident. Color does a lot of the heavy lifting. Soft white, pale blue, muted green, warm gray, buttercream, dusty blush, and classic black-with-white-trim can all work beautifully, depending on your home and landscape.
If you want the shed to disappear into the garden, choose a natural, plant-friendly color. If you want it to pop, go brighter on the door or trim. A cheerful front door color, like coral, mustard, robin’s egg blue, or deep red, can make a very simple shed feel custom.
Just do yourself a favor and test paint in outdoor light first. That “calm sage” can become “surprisingly pickle” in full afternoon sun.
Add Trim and Hardware With Restraint
Trim is what gives a basic shed its clean, finished outline. Corner boards, door casing, fascia details, and simple decorative brackets can make a huge difference. The same goes for hardware. A classic latch, strap hinges, and a handsome handle can elevate the whole design.
The trick is not to over-accessorize. You are aiming for charming, not costume party cottage.
How to Make It Functional Inside
A cute shed that is a disaster inside is just a pretty lie. The inside has to earn its keep.
Start With Vertical Storage
Wall space is your best friend. Use peg rails, hooks, hanging baskets, and mounted racks to lift tools off the floor. Long-handled tools should stand neatly or hang securely. Small hand tools should have designated spots. The more visible and reachable everything is, the less likely you are to lose your favorite pruners for six months in a bucket of mystery items.
Install Shelving Before Clutter Moves In
This is a deeply underrated move. Put shelves in before you start filling the shed. Open shelves work well for pots, watering cans, jars of plant labels, and seed-starting supplies. A narrow counter or potting bench adds workspace without eating the whole room. If your shed is tiny, shallow shelves above eye level can add storage without making the space feel cramped.
Think in Zones
The easiest way to keep a shed organized is to divide it by use. Put digging tools in one zone, watering gear in another, seed-starting materials together, and seasonal decor somewhere it will not attack your ankles every time you walk in. If you use the shed for both gardening and outdoor storage, draw a mental line between the pretty plant side and the practical tool side.
That one decision alone can save you from chaos.
Don’t Forget the Outside Styling
If you want your shed to feel like a destination instead of a utility structure, landscape around it like you mean it.
Create a Welcoming Path
A gravel, brick, stepping-stone, or mulch path leading to the door makes the shed feel integrated into the yard. It also keeps you from marching through wet grass every time you need a trowel. Functional and elegant is a very satisfying combination.
Plant Around the Base
Soften the structure with surrounding beds, but do not cram shrubs right against the walls. You want airflow and access for maintenance. Low perennials, cottage flowers, herbs, and container plantings can frame the shed beautifully without trapping moisture. A pair of planters by the door instantly makes the whole setup look styled.
Add One Delightful Detail
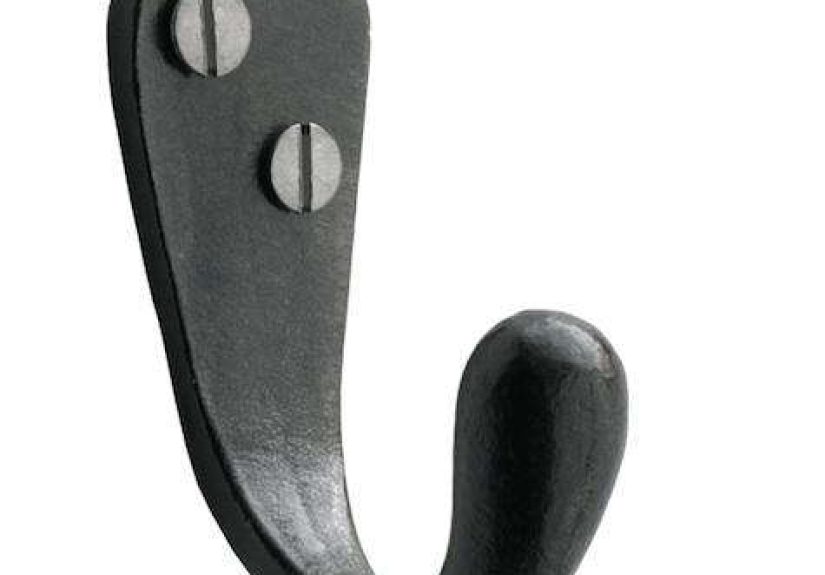
Every memorable shed has one little flourish. Maybe it is a Dutch door. Maybe it is lantern-style lighting. Maybe it is a tiny porch, a trellis, a wreath, a painted sign, or antique-style hooks for aprons and baskets. You only need one or two special elements to make the shed feel distinct.
Resist the urge to throw every Pinterest idea at it at once. Let the shed breathe.
Mistakes That Can Ruin the Look
Even the cutest vision can go sideways if the basics are skipped. The most common mistakes are building on a poor base, ignoring drainage, choosing a location with awkward access, underestimating storage needs, and overdecorating before the structure itself looks finished.
Another big one: making the shed too small. Tiny is charming. Impossible is not. If you want room for shelving, a potting bench, a stool, and long tools, give yourself enough width to move like a human instead of a folded lawn chair.
What the Experience of Building One Is Really Like
Here is the honest truth about creating the cutest DIY garden shed ever: the experience is equal parts excitement, second-guessing, dusty shoes, and unexpected emotional attachment. At some point, this structure will stop being “the shed project” and start being “my little shed,” and that is when you know you are in deep.
It usually starts with inspiration. You see a charming shed with shutters, a potting bench, and climbing flowers, and suddenly your current storage setup feels personally offensive. You begin with noble goals like “I just want a clean place for my tools,” but within days you are comparing rooflines and wondering whether brass hardware is too much for a building meant to hold mulch.
Then comes the planning phase, which is where fantasy meets the measuring tape. This is often the first humbling moment. The spot that looked perfect from the patio turns out to slope more than expected. The door swing conflicts with a fence. The adorable window placement interferes with shelving. You realize that cuteness, like most worthwhile things, needs math.
Once construction begins, the experience becomes very physical and very real. There is a special kind of satisfaction in seeing a level base go in, watching walls take shape, and realizing that something you imagined is now standing in the yard. Even a modest shed feels surprisingly significant. It changes the landscape. It creates a destination. It says, “Someone here has plans and probably owns pruning shears.”
There are also classic DIY moments that practically everyone experiences. One board is slightly off. A corner needs adjusting. You make three trips for hardware you thought you already had. You stand back dramatically after painting the door and realize the color is either absolutely perfect or one shade more cheerful than your nervous system expected. This is normal. Backyard projects are built on optimism and store receipts.
The best part often comes after the main build is done. Styling and organizing the shed is where the emotional reward shows up. You hang the hooks. You line up the terra-cotta pots. You place seed packets in a jar, tuck gloves into a basket, sweep the floor, and suddenly the space feels calm. Useful, yes, but also strangely restorative. A good garden shed makes outdoor work easier. A great one makes it more enjoyable.
There is also a seasonal joy to it. In spring, the shed becomes command central for planting. In summer, it is the shady little stop between watering and weeding. In fall, it gathers bulbs, twine, and cleanup tools. In winter, even when the garden looks sleepy, the shed still adds structure and charm to the yard. It keeps giving long after the paint dries.
And maybe that is the biggest experience-related takeaway of all: building a cute shed is not just about storage. It changes how you use your outdoor space. It invites you outside more often. It makes chores feel lighter. It creates a tiny place of order in the middle of dirt, weather, and seasonal mess. That is a pretty wonderful return on investment for a small building with a very big personality.
Final Thoughts
The cutest DIY garden shed ever is not necessarily the biggest shed, the most expensive shed, or the one with the fanciest features. It is the one that fits your yard, solves real problems, and looks like it belongs there. Start with a smart site, a durable foundation, and a practical layout. Then bring in the details that make it charming: windows, trim, paint, flowers, lighting, and smart organization.
When it is done, you will have more than backyard storage. You will have a hardworking little landmark that makes the whole garden feel more complete. And yes, you may absolutely linger in the doorway admiring it like a proud stage parent. That is part of the process.