Table of Contents >> Show >> Hide
- Why Dollar Store Frames Are Perfect for a Paint Makeover
- First: Identify What You’re Painting (Because It Changes Everything)
- Supplies That Make This Easy (Not Perfect-But-Frustrating)
- Prep Like You Mean It (This Is Where “Pro-Looking” Happens)
- Choose Your Paint Path: Spray, Brush, or Chalk-Style
- Step-by-Step: How to Paint Dollar Store Frames (Spray or Brush)
- Make It Look Expensive: Finishes That Fool the Eye
- Reassemble Like a Neat Freak (Even If You’re Not One)
- Gallery Wall Tricks That Make Painted Frames Look Intentional
- Troubleshooting: Common Problems and Quick Fixes
- Conclusion: of Real-World Frame Painting Lessons (So You Don’t Learn Them the Hard Way)
- SEO Tags
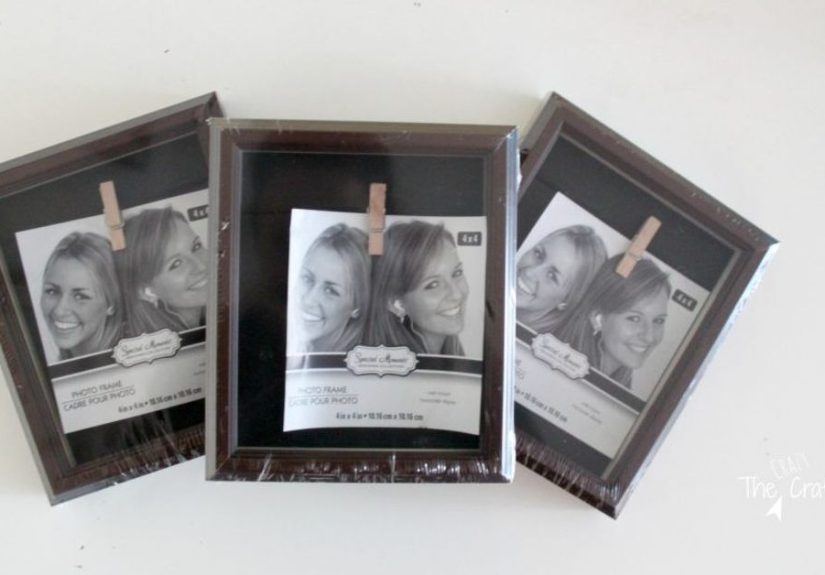
If you’ve ever wandered the dollar store frame aisle thinking, “Cute… but why do they all look like they were designed by a committee of beige,” you’re in the right place. Dollar store frames are the MVP of budget decoratinglightweight, plentiful, and surprisingly versatile. The only problem? They often look exactly like what they are: a fast, cheap solution.
The good news: paint is basically a personality transplant for frames. With the right prep and a few smart technique choices, you can make a $1.25 frame look like it belongs in a boutique shopwithout sacrificing your entire weekend (or your patience). This guide breaks down what to paint, how to prep, which paints actually behave, and how to get finishes that look expensive instead of… “craft fair 2009.”
Why Dollar Store Frames Are Perfect for a Paint Makeover
Dollar store frames are ideal for painting for three big reasons:
- Low risk, high reward: If you hate the color, you’re out a couple bucksnot a “why did I do this” $45.
- Easy to coordinate: Paint a mismatched set the same color for an instant gallery wall that looks intentional.
- They’re often made of “paintable” materials: Many are plastic, MDF/composite, or thin woodeach can take paint well with the right prep.
First: Identify What You’re Painting (Because It Changes Everything)
Before you crack open paint, figure out what you’re working with. Dollar store frames typically fall into these categories:
Plastic frames
Common, lightweight, and sometimes shiny. Paint can stick beautifullyor peel off in sad, curly stripsdepending on prep. Plastic usually needs a good clean, a light scuff sanding, and often a bonding primer or adhesion-promoting primer.
MDF/composite “wood” frames
These are pressed/engineered materials that paint easily, but edges can soak up paint like they’re thirsty. Primer helps you get a smoother, more even finish.
Thin wood frames
Great for brushing or spraying. If there are knots or tannins, primer matters even more (otherwise you can get discoloration bleeding through later).
Metal frames
Less common at the dollar store, but they show up. Metal benefits from cleaning, light scuffing, and a primer made for metal for best durability.
Supplies That Make This Easy (Not Perfect-But-Frustrating)
You can paint frames with minimal supplies, but a few basics will upgrade the result fast:
- Microfiber cloths or lint-free rags
- Dish soap + water (for grime)
- Rubbing alcohol (for oils/residue)
- Fine-grit sandpaper (220–320) or a sanding sponge
- Painter’s tape
- Drop cloth/cardboard for overspray
- Primer (spray or brush-on, matched to material)
- Paint (spray paint, acrylic craft paint, or chalk-style paint)
- Topcoat (optional but helpful): clear spray sealer, wax, or water-based polyurethane
Prep Like You Mean It (This Is Where “Pro-Looking” Happens)
Painting frames is 20% painting and 80% not skipping prep because you’re excited. Here’s the simple, reliable prep routine:
Step 1: Disassemble the frame
Remove the backing, glass, insert, and any hardware you can easily take off. If the glass won’t remove, mask it carefully with painter’s tape and paper so you don’t accidentally create “abstract frosted glass.”
Step 2: Clean it thoroughly
Wash with a little dish soap and warm water if it feels dusty or grimy. Let it dry completely. Then wipe down with rubbing alcohol to remove oils and residue that can cause fish-eye spots or peeling. Let the alcohol flash off (it dries quickly).
Step 3: Scuff sand (yes, even if it’s boring)
You’re not sanding off the frame’s whole identityjust lightly roughing the surface so primer/paint can grip. Focus on shiny plastics and glossy finishes. Wipe away dust with a clean, lint-free cloth.
Step 4: Prime based on the material
Primer is your insurance policy. It helps paint bond, evens out texture, and keeps weird stains from showing through.
- Plastic: Use a bonding primer or an adhesion-promoting primer if the surface is slick or flexible.
- MDF/composite: Use a general primer to prevent uneven absorption (especially on edges).
- Wood: Use primer if the wood is raw, stained, or knotty.
- Metal: Use a primer formulated for metal to improve durability.
Choose Your Paint Path: Spray, Brush, or Chalk-Style
The best method depends on the finish you want, the frame’s details, and how patient you feel that day.
Option A: Spray paint (fastest, smoothest finish)
Spray paint is the go-to for frames because it gives a clean, even finishespecially on frames with grooves or ornate texture. It’s also the easiest way to make a cheap frame look sleek and modern.
Best for: plastic frames, detailed frames, matching sets for gallery walls, metallic finishes.
Option B: Brush-on acrylic or latex (best for color mixing and small spaces)
Brush paint works well if you want a custom color (like “the exact blue of my living room pillows”), or you’re painting indoors and want minimal fumes. The tradeoff: brush marks can happen, especially on glossy frames.
Best for: flat frames, simple profiles, matte looks, quick touch-ups.
Option C: Chalk-style paint (best for vintage, matte, distressed looks)
Chalk-style paint is popular for its velvety finish and how easily it distresses. It’s excellent for frames if you’re going for farmhouse, antique, or soft vintage styles.
Best for: rustic decor, “found it at an antique market” vibes, layered finishes.
Step-by-Step: How to Paint Dollar Store Frames (Spray or Brush)
1) Set up your workspace
Work in a well-ventilated area. For spray paint, outdoors is best when it’s not windy and not in harsh direct sun. Lay down cardboard or a drop cloth.
2) Use light coats (thick coats are how drips are born)
Whether spraying or brushing, thin layers win. You’re building a finish, not frosting a cake.
- Spray: Start spraying off to the side, then sweep across the frame. Keep your distance consistent. Do multiple light coats instead of one heavy coat.
- Brush: Use a small foam brush or high-quality angled brush. Work paint into corners, then smooth it out. Don’t overwork it as it dries.
3) Let it dry between coats
Dry-to-touch isn’t the same as ready-for-another-coat. If you recoat too soon, you can get tacky texture, fingerprints, or peeling. Follow your paint can’s recoat window.
4) Sand lightly only if needed
If you get dust bumps, a run, or a weird texture, let the coat dry fully, then lightly sand with fine grit and wipe clean. Then apply another thin coat.
5) Optional: Seal it for durability
Frames don’t get the same abuse as tabletops, but they do get handled. If you’re using chalk-style paint or a finish that scuffs easily, sealing is smart.
- Spray clear coat: Good for spray-painted frames and metallic looks.
- Water-based polyurethane: Great for brush-painted frames; choose matte or satin for a modern look.
- Wax: Classic for chalk-style paint; buff gently once dry for a soft sheen.
Make It Look Expensive: Finishes That Fool the Eye
Matte modern black
Instantly upgrades anything. Pair with white mats and black-and-white prints for a clean gallery wall look. Bonus: matte black hides minor imperfections like it’s being paid to do it.
Soft antique gold (without the shiny “trophy store” vibe)
Start with a dark base (like espresso or deep brown), then dry-brush metallic gold on raised edges. Keep it subtle. The goal is “old frame from a fancy estate sale,” not “gold spray paint accident.”
Two-tone frames
Paint the outer edge one color and the inner lip another. It creates depth and looks custom. Painter’s tape helps, but remove it carefully so you don’t peel paint.
Distressed vintage
After your paint dries, lightly sand corners and raised details to reveal the base layer or original color. Distressing looks best when it’s restrainedlike seasoning, not like panic.
Stone, plaster, or “chalky” texture
Use chalk-style paint and dab it with a stencil brush or sponge for subtle texture. Seal lightly to preserve the matte look.
Reassemble Like a Neat Freak (Even If You’re Not One)
Once paint is fully dry and cured enough to handle, reassemble:
- Clean the glass before putting it back (fingerprints love to photobomb).
- Upgrade the backing if it’s flimsy: cut a piece of mat board or foam board to size.
- Consider swapping the insert for a real mat or a printed pattern to make the frame look higher-end.
- Check hanging hardware. Some cheap frames come with hardware that feels like it was engineered to fail at 2 a.m.
Gallery Wall Tricks That Make Painted Frames Look Intentional
- Unify with one finish: Paint all frames the same color for instant cohesion.
- Or unify with a “color family”: For a curated look, use different shades of the same color (like warm whites, creams, and soft taupes).
- Keep mats consistent: Matching mats (all white, all cream, or all black) can make mixed frames look like a planned collection.
- Mix sizes, not chaos: Use 2–3 frame sizes repeated across the wall for rhythm.
Troubleshooting: Common Problems and Quick Fixes
Paint is peeling off plastic
This usually means the surface was too slick or oily, or primer wasn’t right for plastic. Fix: sand lightly, clean with alcohol, use a bonding primer, then repaint in light coats.
Sticky finish that never seems to dry
Often caused by heavy coats, humidity, or recoating too soon. Fix: give it more time, add airflow, and avoid stacking frames together while curing.
Drips and runs
Classic “I got impatient” symptom. Fix: let it dry fully, sand smooth, then apply thinner coats.
Brush marks
Use a foam brush, thinner coats, and avoid overbrushing as paint starts to set. If you want a perfectly smooth finish, spray paint is usually the easier win.
Conclusion: of Real-World Frame Painting Lessons (So You Don’t Learn Them the Hard Way)
I once decided I was going to “quickly” update a set of dollar store frames for a hallway gallery wall. You know, a cute little afternoon project. A casual crafting moment. A relaxing reset. Reader, I was wrong on multiple counts.
Lesson one: dollar store frames come in more personalities than a reality TV reunion. Some plastic frames are smooth and cooperative. Others are weirdly slicklike they’ve been coated in “paint repellant, but make it fashion.” The cooperative ones accepted primer and spray paint like a dream. The slick ones taught me that prep isn’t optional; it’s the price of admission. After my first coat started to scratch off with a fingernail, I went back, scuffed sanded, wiped with rubbing alcohol, used a bonding primer, and suddenly the paint acted like it actually wanted to be there.
Lesson two: the best-looking frames weren’t the ones I tried to “perfect.” They were the ones I kept simple. Matte black spray paint? Instant designer. Warm white with a satin clear coat? Clean, modern, and surprisingly expensive-looking. The frames I tried to get fancy withglitter topcoat, heavy metallic, and an ambitious “ombre experiment”were the ones that looked like I should’ve put them in time-out to think about what they’d done.
Lesson three: light coats are basically therapy for spray paint. The moment I got cocky and sprayed too much, I got drips. And drips don’t just dry and disappear out of kindness. They dry and sit there… forever… like a tiny plastic reminder that patience exists. Once I committed to multiple light passes, the finish smoothed out, coverage built evenly, and the frames looked dramatically better. Also: don’t spray in a gusty wind unless you enjoy the thrill of finding your paint on places it does not belong (like your shoes, your driveway, and somehow your elbow).
Lesson four: sealing is about handling, not just durability. Frames aren’t coffee tables, but you do touch themespecially while leveling them on the wall for the 47th time because the hallway lighting makes everything look crooked. When I sealed chalk-style painted frames with wax, they felt smoother and didn’t pick up fingerprints as easily. When I used a clear spray topcoat over spray paint, the surface felt more finished, and it was easier to wipe dust off without worrying I was “cleaning away” the paint.
Lesson five: the gallery wall looks more expensive when the inside is intentional too. The fastest upgrade I made wasn’t even paintit was swapping flimsy inserts for real mats or crisp cardstock in consistent colors. Suddenly the frames looked curated. Pair that with one unifying frame color, and you get that “I hired someone” vibeeven though you very much did not.
So here’s the truth: updating dollar store frames with paint is one of the highest-impact, lowest-cost DIY upgrades you can do. Clean well, scuff sand shiny surfaces, prime smart, paint in light coats, and give it enough drying time to cure before you wrestle it onto the wall. Then step back and enjoy the magic of turning “cheap and cheerful” into “custom and classy”with nothing but paint, a little prep, and just enough self-control to avoid glitter spray unless you truly mean it.