Table of Contents >> Show >> Hide
- Why the Attic Matters More Than You Think
- How an Attic Inspection Usually Works
- What Inspectors Look For in the Attic
- 1) Insulation: coverage, depth, and condition
- 2) Air sealing: the invisible energy leak
- 3) Ventilation: intake, exhaust, and “is it actually working?”
- 4) Bathroom and kitchen exhaust fans: where does the air go?
- 5) Moisture, leaks, and staining: reading the attic “tea leaves”
- 6) Roof framing and structure: trusses, rafters, and “DIY surprises”
- 7) Electrical: junction boxes, splices, and fire safety
- 8) HVAC equipment and ducts: comfort clues
- 9) Pests and critters: the attic’s “uninvited tenants”
- 10) Materials that need extra caution: vermiculite and asbestos concerns
- Common Attic Findings (and What They Often Mean)
- How to Prepare for an Attic Inspection (So It’s Actually Useful)
- Questions Worth Asking Your Inspector
- What Happens After the Inspection: Turning Findings Into a Plan
- Extra: of Real-World Attic Inspection Experiences
- Experience #1: “The roof looked perfect… until the attic told the truth.”
- Experience #2: “We blamed the HVAC… but it was the attic hatch.”
- Experience #3: “The bathroom fan was venting into the attic for years.”
- Experience #4: “We found vermiculite and suddenly everyone got very serious.”
- Experience #5: “The attic was a wildlife documentary.”
The attic is the part of your home that quietly keeps score. It tracks every roof leak you didn’t notice, every bathroom fan that “kinda vents,” and every winter you tried to heat the neighborhood. A home attic inspection is where all those secrets get read out loudpolitely, in a report, usually with photos that make you say, “Wait… that’s my house?”
Whether you’re buying a home, selling one, or just trying to figure out why your upstairs bedroom feels like a toaster in July, an attic inspection is one of the fastest ways to understand your home’s health. It’s typically a visual evaluation of accessible areas (translation: inspectors don’t do parkour through unsafe spaces), focused on structure, insulation, ventilation, moisture, electrical safety, and evidence of pests.
Why the Attic Matters More Than You Think
Homeowners sometimes treat the attic like a storage unit with bad lighting. But in reality, the attic is where small problems become big invoices. Heat loss, condensation, roof leaks, and critter activity often show up here first. Catching issues early can protect:
- Your roof system (leaks, staining, rot, damaged sheathing)
- Your energy bills (insulation gaps, air leaks, duct losses)
- Your indoor air quality (moisture problems and potential microbial growth)
- Your safety (electrical hazards and fire risks)
- Your home’s structure (framing movement, cracked members, improper modifications)
In short: the attic is a diagnostic window into how your home breathes, drains, and survives the seasons.
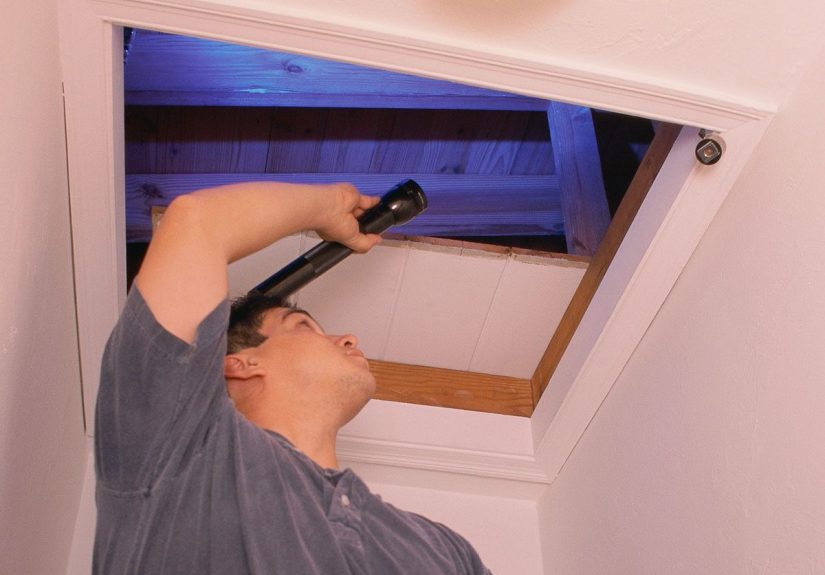
How an Attic Inspection Usually Works
Step 1: Access and safety check
The inspector will locate the attic access (hatch, pull-down stairs, closet opening, garage scuttle) and evaluate whether it’s safe to enter. Limited clearance, weak framing, blocked access, or unsafe wiring can limit what can be inspectedthis is common and usually documented clearly.
Step 2: Quick scan, then a systematic review
Most inspectors start with a “big picture” scan: visible roof decking, major framing members, obvious staining, and ventilation layout. Then they move through a more structured checklistoften covering insulation, ventilation, moisture, electrical, HVAC/ducting, and pest evidence.
Step 3: Photos, notes, and (sometimes) tools
A standard attic inspection is primarily visual, but inspectors may use tools like moisture meters, thermometers, and occasionally infrared imaging to help spot temperature differences or moisture patterns. Don’t worryno one is x-raying your childhood holiday decorations. The goal is to document conditions and flag red flags.
What Inspectors Look For in the Attic
1) Insulation: coverage, depth, and condition
Insulation is the attic’s “winter coat,” and inspectors want to see if it’s thick enough, evenly distributed, and not damaged. They may note:
- Type: fiberglass batts, blown-in cellulose/fiberglass, spray foam, or older materials
- Depth/level: whether it appears consistent and appropriate for the home and climate
- Compression or gaps: insulation squished under storage boards or missing near eaves
- Moisture damage: wet, matted, or stained insulation that may signal leaks or condensation
A common “aha” moment: the attic has insulation, but it’s uneventhin near the access hatch, missing around recessed lights, or pushed aside near vents. Even small gaps can let conditioned air escape, which can drive up energy costs and increase moisture risk.
2) Air sealing: the invisible energy leak
Air sealing is about stopping indoor air from leaking into the attic through cracks and penetrations. Inspectors often look for obvious bypasses around:
- Attic hatches/pull-down stairs (often a big leak point)
- Plumbing stacks and wiring penetrations
- Chimney and flue chases (these require proper fire-safe clearances)
- Recessed lights and ceiling fans
- Top plates along interior walls
If warm, moist indoor air leaks into a cold attic, it can condense on roof decking and nailscreating the kind of “mystery moisture” that turns into mold complaints later. Air sealing and ventilation usually work as a team, not rivals.
3) Ventilation: intake, exhaust, and “is it actually working?”
Attic ventilation helps control heat and moisture by moving air through the spacetypically with intake vents low (like soffit vents) and exhaust vents high (like ridge or roof vents). Inspectors commonly check:
- Vent types: soffit, ridge, gable, roof vents, turbines, powered fans
- Balance: whether there appears to be both intake and exhaust
- Blockages: insulation covering soffit vents, crushed baffles, debris screens clogged
- Red flags: rusted fasteners, damp sheathing, musty odor, or visible staining that can suggest moisture issues
Some building codes reference minimum ventilation area ratios (commonly expressed as a fraction of attic floor area), but real-world performance also depends on airflow pathways and proper installation. Translation: you can have vents and still have a ventilation problemlike owning a treadmill that’s currently a coat rack.
4) Bathroom and kitchen exhaust fans: where does the air go?
One of the most common attic findings is an exhaust duct that ends in the attic instead of venting outside. That warm, moist air can soak insulation and encourage condensation. Inspectors often look for:
- Ducts properly routed to exterior terminations
- Loose connections or disconnected ducting
- Kinks or sagging flex duct that traps moisture
- Signs of moisture buildup near the duct outlet area
If your attic smells like a spa day when nobody’s showering, this is one of the first suspects.
5) Moisture, leaks, and staining: reading the attic “tea leaves”
Moisture is the attic’s number-one troublemaker. Inspectors scan the underside of roof decking and framing for:
- Water stains around roof penetrations (vents, chimneys, skylights)
- Darkened or delaminated sheathing that may indicate prolonged moisture
- Rusty nails/fasteners suggesting condensation patterns
- Wet insulation or compressed spots
- Visible microbial growth or musty odors linked to chronic moisture
Important nuance: stains can be old, repaired leaksor signs of an ongoing issue. A good inspector calls out the evidence, notes limitations, and recommends further evaluation when needed (for example, by a roofer or mold professional if conditions warrant).
6) Roof framing and structure: trusses, rafters, and “DIY surprises”
The attic is where the roof’s skeleton is visible. Inspectors typically look for:
- Cracked, cut, or altered truss/rafter members
- Sagging or unusual deflection
- Separated joints, missing connectors, or improvised supports
- Evidence of rot or insect damage
A classic example: someone cut a truss to “make room for storage.” That can be a structural concern, because trusses are engineered systemsremoving parts is like taking bolts out of a bridge and hoping optimism fills the gap.
7) Electrical: junction boxes, splices, and fire safety
Attics often contain wiring runs, junction boxes, and sometimes older systems. Inspectors commonly flag:
- Open junction boxes (should have covers)
- Loose or improper splices
- Damaged cable sheathing
- Improperly supported wiring
- Older or questionable wiring methods that may warrant electrician review
Electrical issues in concealed spaces can be especially risky because problems can go unnoticed for a long time. If the inspection report suggests an electrician evaluation, it’s not dramait’s prevention.
8) HVAC equipment and ducts: comfort clues
If your attic houses an air handler, ductwork, or vents, inspectors may note:
- Duct insulation condition and continuity
- Disconnected or crushed ducts
- Signs of condensation near equipment or ducts
- Clear access for servicing (because technicians are humans, not contortionists)
Leaky or poorly insulated ducts in an unconditioned attic can waste energy and contribute to comfort issues. If your HVAC works hard but your rooms still argue with the thermostat, ducting is often part of the plot.
9) Pests and critters: the attic’s “uninvited tenants”
Attics are popular with rodents, squirrels, birds, and insects. Inspectors look for droppings, nesting, chewed wiring, and damaged insulation. If there’s evidence of rodents, safe cleanup mattersdroppings should be handled carefully and disinfected rather than swept or vacuumed dry.
A practical takeaway: if the report notes pest activity, you usually want two actions(1) pest control to remove and exclude, and (2) repair work to fix entry points and damaged materials.
10) Materials that need extra caution: vermiculite and asbestos concerns
Some older attics contain vermiculite insulation, which can be associated with asbestos contamination. If vermiculite is suspected, the safest advice is typically to avoid disturbing it and consult qualified professionals for assessment and next steps. This is one reason inspectors may be cautious about moving insulation around during an inspection.
Common Attic Findings (and What They Often Mean)
Here are a few “symptom-to-possible-cause” patterns you’ll often see in attic inspection reports:
- Frost or condensation on nails/sheathing in winter: warm moist air leaking from the house + inadequate ventilation
- Stained roof decking near vents/chimney: flashing issues, roof penetration leaks, or wind-driven rain entry
- Insulation thin near eaves: baffles missing, insulation displacement, or limited space requiring better detailing
- Bathroom fan duct ending in attic: moisture being dumped into attic (common and fixable)
- Chewed wires or compressed insulation tunnels: rodent activity (needs exclusion + repairs)
- Musty odor + dark wood spotting: moisture problem that may require ventilation/air sealing improvements and professional evaluation
Notice the theme? Most attic problems aren’t “one thing.” They’re a chain reaction: air leaks lead to moisture, moisture leads to damage, and damage leads to repairs. The attic is where you can spot the chain early.
How to Prepare for an Attic Inspection (So It’s Actually Useful)
You don’t need to stage your attic like a real estate listing (though if you do, please send photos). A few simple steps can help the inspector see more and report better:
- Clear access to the attic hatch or pull-down stairs
- Move stored items away from the entry so the inspector can safely step in
- Provide notes about past roof leaks, repairs, or recurring moisture issues
- Don’t run humidifiers excessively right before the visit if you’re investigating moisture concerns
- Have receipts handy for major work (roof replacement, insulation upgrades, ventilation changes)
If you’re a buyer, this is also a great moment to ask the inspector to explain findings in plain English. The attic is not the place for interpretive dance.
Questions Worth Asking Your Inspector
- Was the attic fully accessible? If not, what was limited and why?
- Do you see signs of active moisture, or only past staining?
- Does the attic appear to have balanced intake and exhaust ventilation?
- Is insulation coverage consistent, and are there obvious air leakage points?
- Are bathroom/kitchen exhaust ducts properly routed to the exterior?
- Do any electrical conditions warrant an electrician evaluation?
- What repairs should be prioritized immediately vs. monitored?
What Happens After the Inspection: Turning Findings Into a Plan
A good attic inspection report typically includes photos, descriptions, and recommendations. The smartest next step is prioritization:
Priority 1: Safety and active damage
Anything involving electrical hazards, active leaks, structural concerns, or significant moisture conditions should move to the top of the list. These items can worsen quickly and may affect insurability or negotiations during a home purchase.
Priority 2: Moisture control improvements
If moisture signs are present, the fix is often a combination: seal attic air leaks, ensure exhaust fans vent outside, and improve ventilation pathways. Think of it as fixing both the “water source” and the “wet basement smell” at the same time.
Priority 3: Comfort and efficiency upgrades
Insulation and air sealing improvements can make a noticeable difference in comfort and energy use. Many homeowners are surprised how much attic work changes the feel of second-floor roomsespecially in older homes.
Extra: of Real-World Attic Inspection Experiences
Attic inspections have a way of becoming unforgettable, even if you’d rather forget them. Here are some common experiences homeowners and buyers reportminus the nightmares, plus the useful lessons.
Experience #1: “The roof looked perfect… until the attic told the truth.”
A buyer walks the exterior with their agent and thinks, “Greatshingles look fine, gutters are clean, no obvious problems.” Then the inspector pops into the attic and finds a constellation of stains around a plumbing vent. The ceilings downstairs look spotless because the leak has been slow, and the insulation is hiding it like a very committed stage crew.
The outcome is often positive: the buyer negotiates a roof repair credit or requires repair before closing. The bigger lesson is that a roof can “look okay” from the street while still leaking at penetrations. The attic is the behind-the-scenes view you can’t get from curb appeal.
Experience #2: “We blamed the HVAC… but it was the attic hatch.”
Homeowners often assume uneven temperatures mean they need a new HVAC system. During an attic inspection, the inspector points at the pull-down attic stairsunsealed, uninsulated, and basically functioning as a giant hole to the outdoors. The upstairs hallway is hot in summer and chilly in winter because conditioned air is escaping right through that access.
After adding weatherstripping and an insulated cover, the home feels more stable, and the HVAC runs less. It’s the kind of fix that isn’t glamorous (nobody posts “Look at my new hatch gasket!”), but it’s quietly life-improving.
Experience #3: “The bathroom fan was venting into the attic for years.”
This one is incredibly common. A seller says the bathrooms “work fine,” but the attic shows damp insulation and staining near the fan duct area. The duct is either disconnected or ends in the attic. Moist air from showers has been blowing into the space for years, feeding condensation and musty odors.
The repair is usually straightforwardproperly route and terminate the duct to the exterior, seal connections, and replace any damaged insulation. The emotional journey, however, includes a brief phase of denial (“It’s been like that forever!”) followed by acceptance (“Okay, yeah, that explains the smell.”).
Experience #4: “We found vermiculite and suddenly everyone got very serious.”
Sometimes the inspection shifts tone fast. The inspector sees pebble-like insulation that resembles vermiculite and advises not to disturb it. Buyers and homeowners often describe this as the moment they realized an attic is not just “extra space.” It can include materials that require professional handling and careful decision-making.
The best experience outcome is informed action: the homeowner avoids DIY disruption, consults qualified experts, and makes a plan based on risk and budget. The worst outcome is someone stomping around in it “just to check,” which is exactly what you don’t want.
Experience #5: “The attic was a wildlife documentary.”
If an inspector notes droppings, nesting, or chewed materials, homeowners often feel equal parts grossed out and impressed by the determination of small mammals. The practical reality is that pest activity can damage insulation and wiring, and it typically won’t stop until entry points are sealed.
People who handle this well tend to treat it like a two-part project: remove/exclude the animals first, then repair and clean. People who handle it poorly buy one ultrasonic gadget and hope the squirrels respect technology. Spoiler: they do not.
The shared takeaway from these experiences is simple: a home attic inspection doesn’t exist to scare youit exists to give you a clear, actionable picture. The attic is where homes whisper their problems. An inspection is how you translate the whisper into a plan.